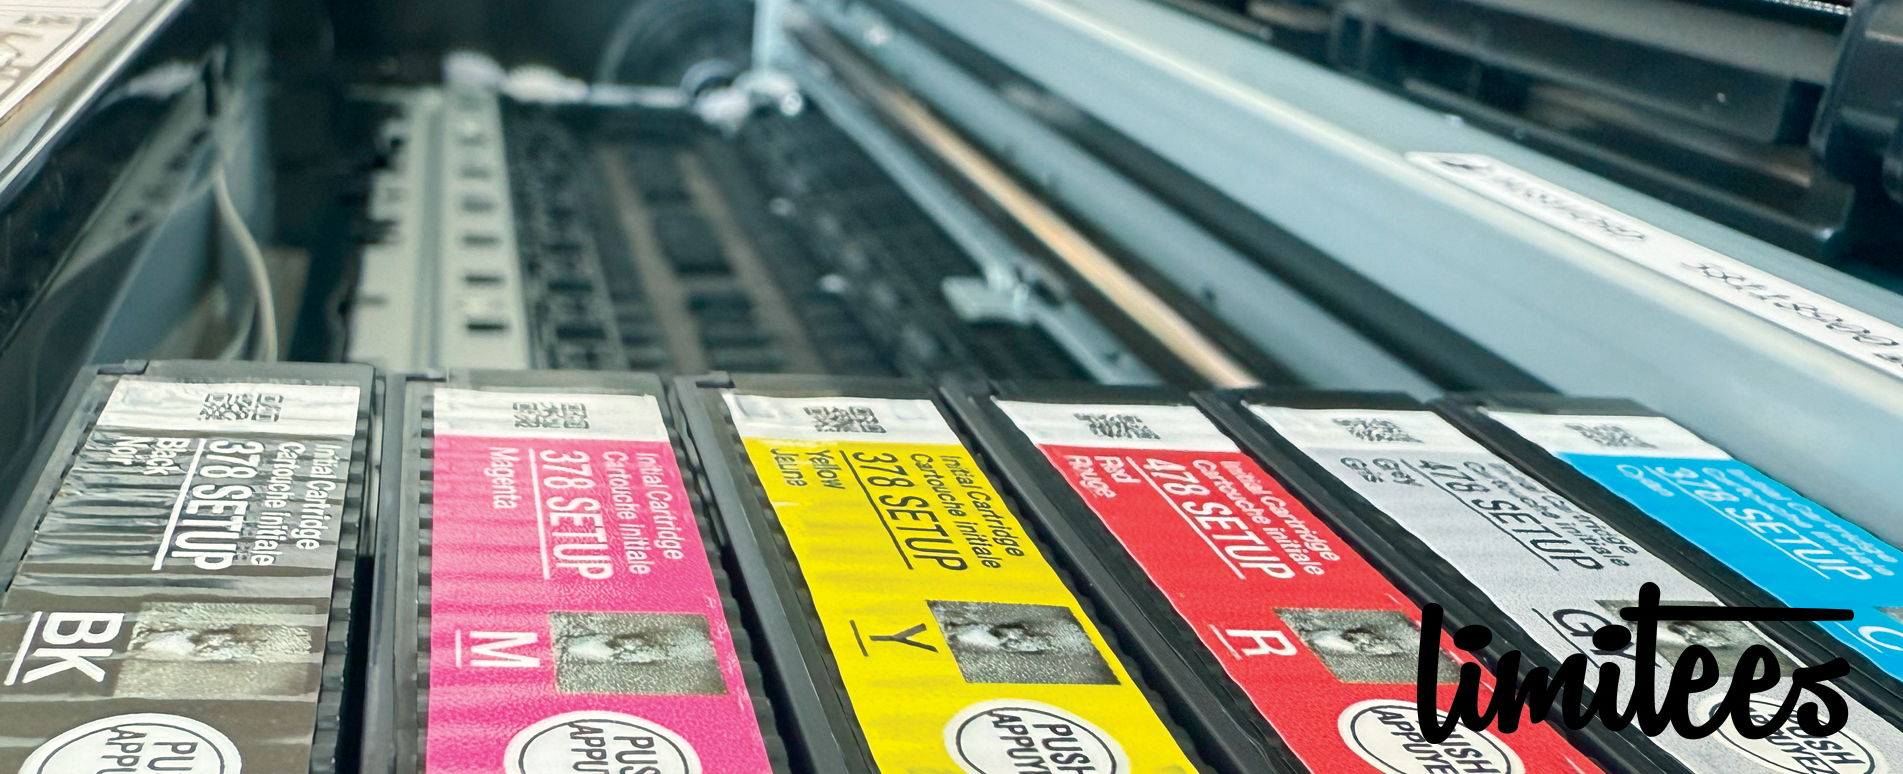
I’m excited to share that I’ve just added an Epson XP-25000 to my screen printing…
Learning Mesh Counts
When I first started screen printing, I didn’t think too much about mesh count. I knew screens came in different variations, but I assumed one would work for everything. That assumption didn’t last long.
Very quickly, I realised that choosing the right mesh count could make or break a print. Too low, and the ink flooded the design, losing all detail. Too high, and the ink didn’t come through properly, leaving a weak, patchy print.
What I Learned About Mesh Count
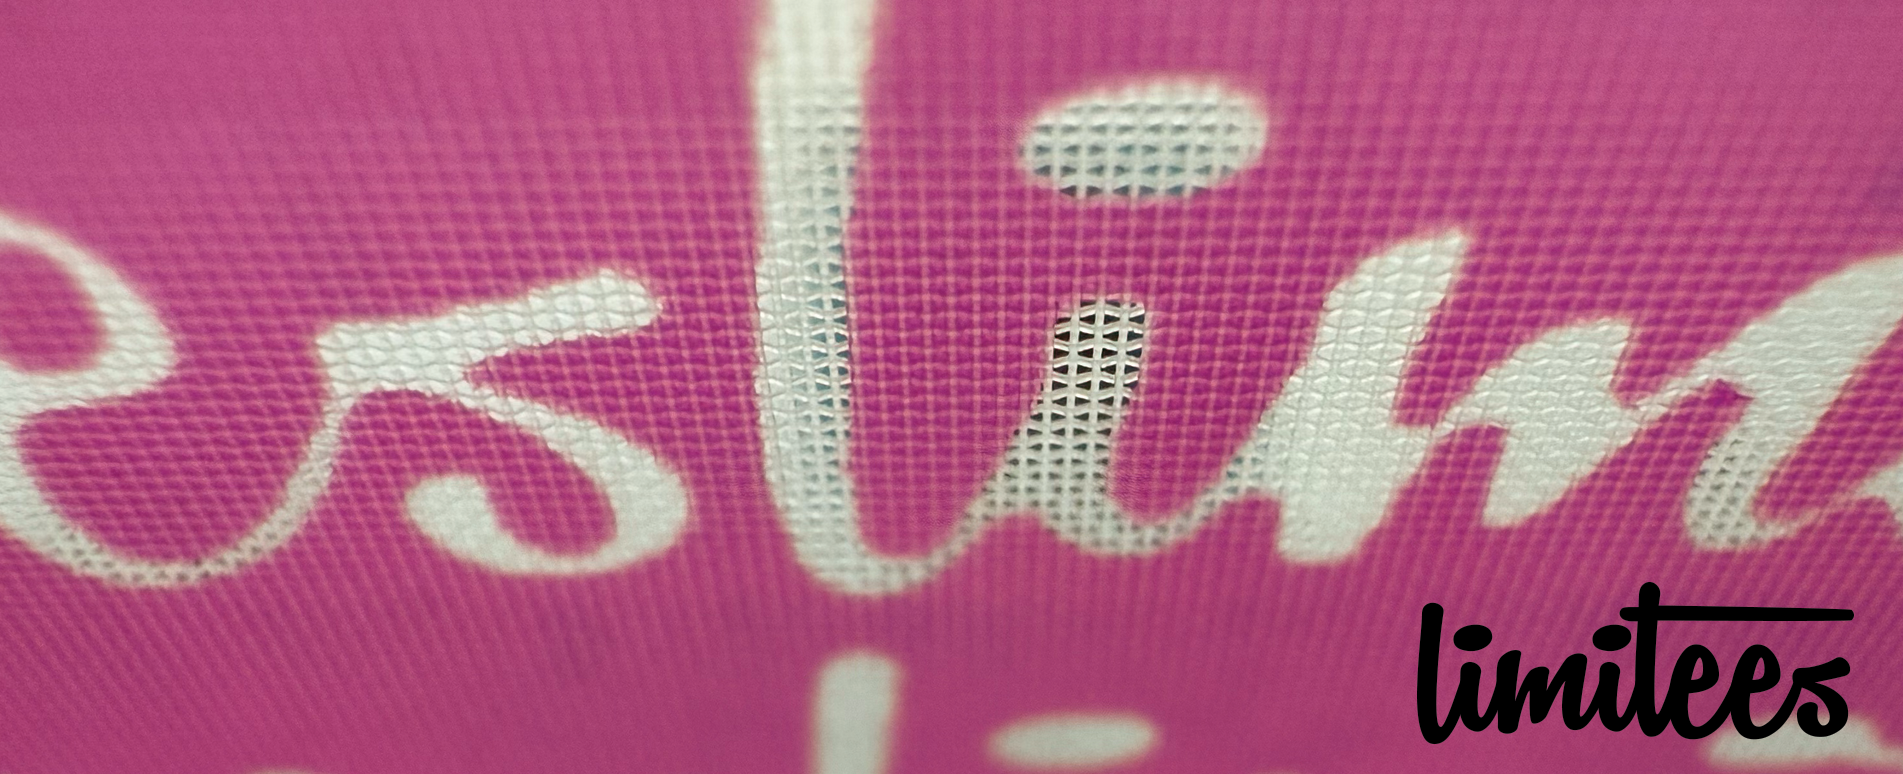
Mesh count refers to the number of threads per centimetre (TPCM) in a screen. A lower mesh count means larger gaps between the threads, allowing more ink to pass through. A higher mesh count has finer openings, meaning less ink is deposited but more detail is retained.
At first, I had no idea which mesh count to use, so I just experimented. Here’s what I learned:
Low Mesh Count (32T – 55T): Great for Heavy Ink Coverage
When I first printed using a 32T screen, I was shocked at how much ink came through—it was thick and heavy, perfect for bold prints and solid colour areas. I later found out that low mesh counts are ideal for printing thick inks like white plastisol, puff inks, and metallics.
Lesson learned: These screens are great for strong, vibrant prints, but they don’t hold small details well.
Medium Mesh Count (62T – 90T): The Versatile Choice
Once I started using 62T and 77T screens, I realised why these are so popular. They allow just the right amount of ink through for most standard screen printing jobs, balancing ink coverage with fine detail. I found this range perfect for printing T-shirts, hoodies, and posters using plastisol and water-based inks.
Lesson learned: If you’re unsure what mesh count to use, this range is a safe bet for most prints.
High Mesh Count (100T – 140T): Perfect for Detail Work
Later on, I experimented with 100T+ screens, and this was where things got interesting. These fine mesh screens are perfect for intricate designs, halftones, and CMYK printing. I also found that they deposit less ink, which results in a softer feel on fabric.
Lesson learned: Higher mesh counts are great for precision work, but they don’t lay down as much ink—so they’re not ideal for bold, blocky prints.
Trial and Error: The Only Way to Learn
At first, I wasted a lot of ink and materials using the wrong mesh counts. But after plenty of trial and error, I started to get a feel for which screen to use for different jobs. Now, I think about the ink type, fabric, and design details before choosing a mesh count, rather than just grabbing the first screen I see!
If you’re new to screen printing, my advice is to experiment and take notes. Each print teaches you something new, and the more you try, the better you’ll understand how mesh counts affect your final results.
Have you had any experiences with using the wrong mesh count? Let me know in the comments—I’d love to hear your stories!
Related Posts