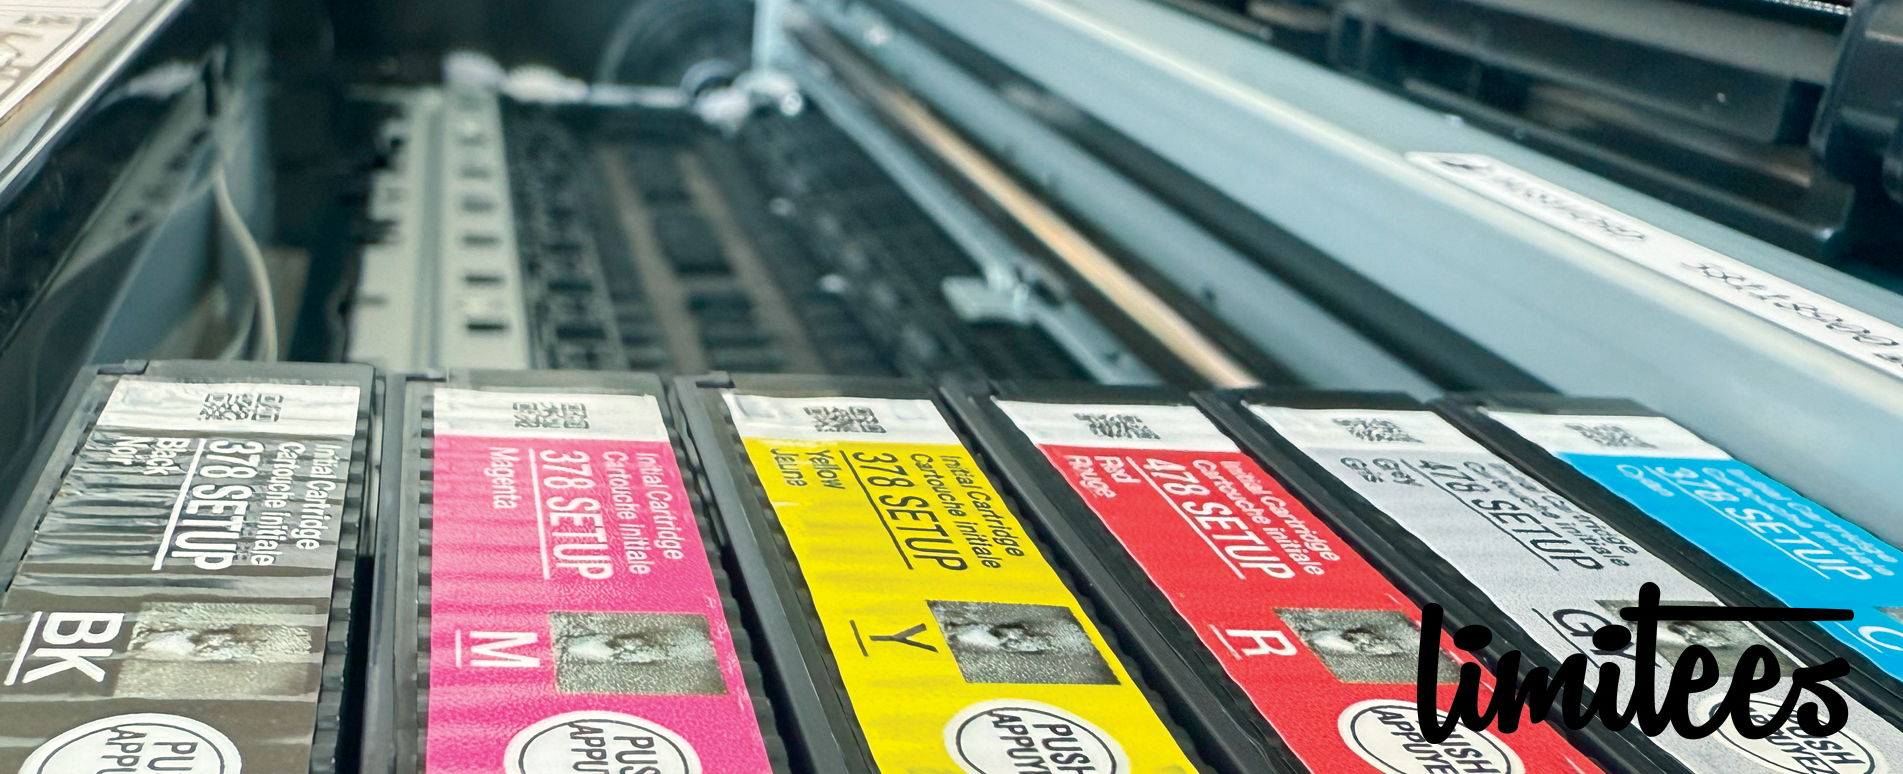
I’m excited to share that I’ve just added an Epson XP-25000 to my screen printing…
Screen Cleaning & Preparation
One of the first things I learned when I started screen printing was that clean, well-prepped screens make all the difference. It’s tempting to jump straight into printing, but if your screens aren’t properly cleaned and prepped, you’ll end up with poor ink flow, ghost images, or even a failed exposure.
Through trial and error, I’ve refined my screen cleaning process to ensure my screens are always in the best condition for printing. Here’s how I do it.

Step 1: Removing Ink After Printing
Once I’ve finished a print run, the first step is to remove any excess ink from the screen. I use a spatula to scrape off as much ink as possible and return it to the container—no point wasting good ink!
Next, I apply screen cleaner or screen wash to break down any remaining ink and wipe it off with a rag. If I’m using water-based inks, I can often just rinse the screen out with water. For plastisol, I use a dedicated ink degrader to ensure all residue is gone.
Tip: Cleaning your screens straight after printing saves you from dealing with dried, stubborn ink later!
Step 2: Using a Dip Tank for Emulsion Removal
For screens that are being reclaimed, I make use of a dip tank. This makes emulsion removal much easier and quicker, especially when I’m dealing with multiple screens.
- Fill the dip tank with emulsion remover solution (it’s a mix of water and emulsion remover).
- Submerge the screen into the solution and let it soak for 5-10 minutes. This helps break down the emulsion so it’s easier to scrub off.
- After soaking, I use a soft brush or cloth to gently scrub away the emulsion residue.
Tip: Dip tanks work best for screens with heavy emulsion buildup. Make sure to use gloves and ventilate the area well, as some removers can be harsh.
Step 3: Using a Washout Booth
After emulsion removal, I always move the screen to a washout booth to rinse it thoroughly. This step ensures no leftover chemicals are on the screen and helps prevent any damage to the mesh.
- I spray the screen under the high-pressure nozzle of the washout booth to remove all emulsion residue.
- I pay extra attention to the squeegee side of the screen, where emulsion can sometimes hide.
- Once the screen is clean, I let it dry fully in a dust-free area before moving on to the next stage.
Tip: A washout booth is ideal for working with larger screens and helps keep your workspace clean by containing water and chemicals.
Step 4: Degreasing the Screen
Before coating a screen with fresh emulsion, it’s essential to degrease it. Even tiny amounts of oil from your hands or dust in the studio can cause issues with emulsion adhesion.
- Apply a degreaser – I use a dedicated screen-printing degreaser or a mild dish soap.
- Scrub both sides – Using a sponge, I gently clean the entire screen.
- Rinse thoroughly – I make sure to remove all soap residue with water.
Tip: Always let the screen dry completely in a dust-free area before applying new emulsion. Any moisture left behind can ruin the coating process.
Step 5: Coating the Screen with Emulsion
Once the screen is fully dry, it’s ready to be coated with emulsion. I’ve experimented with different coating techniques and found that applying two coats on each side (2/2 method) gives me the best results.
Key things I’ve learned about emulsion coating:
Use a scoop coater for an even, smooth layer
Always coat the print side first, then the squeegee side
Let screens dry horizontally in a dark, dust-free space
Avoid humidity—moisture can ruin your emulsion before exposure
Once the emulsion is dry, the screen is ready for exposing a new design!
Final Thoughts
Cleaning and prepping screens might not be the most exciting part of screen printing, but it’s one of the most important. A well-prepped screen ensures sharp prints, consistent results, and longer-lasting screens.
Using tools like a dip tank and washout booth has been a game-changer for me, especially when working with multiple screens or stubborn ink. They save time, keep everything clean, and make the whole process much smoother.
If you’re just getting started, my biggest tip is to develop a routine. The more consistent you are with cleaning and prepping your screens, the fewer printing issues you’ll run into.
Do you have any screen cleaning hacks or mistakes you’ve learned from? Let me know in the comments—I’d love to hear your experiences!
Related Posts